Problem
The old Lync 2010 ServerPool was discovered when running ExchUCUtil. The image below depicts the 2 Pools I was expecting to see 1:2 and 1:1 BUT I wasn’t expecting 1:4.
So when Lync is initially deployed a bunch of references are made in AD, of course if you remove Lync from the environment and don’t do so gracefully then a bunch of unwanted references are ..still in AD.
So far I haven’t seen any other issues due to AD objects still referencing the old Lync 2010 Pool other than whats seen in the screen shot above, but (not being OCD of course) it needs to go as its messing with my Nirvana.
Solution
A deep dive into AD to remove the reference to the Lync 2010 ServerPool showing up here as 1:4.
So lets go and find these references then..
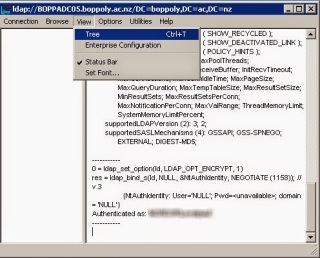
Open LDP by typing ldp in the run box and click OK
Select Connection – Bind

You need to Bind as a valid user,either use the currently logged on user, or specify an account with credentials

The BaseDN will depend on where the information is stored as follows:-
- DC=domain,DC=com (information in System Container)
- CN=Configuration,DC=Domain,DC=COM (information in Configuration
We need to drill down to the RTC Service container. Just a note that when you first see this view there is no indication that the container objects can be expanded, go ahead and double click on them anyway 🙂
We can now search for the old server references. Right click on the RTC Service container and select search
Enter the following string in the Filter box (replacing the OldServerFQDN with the actual FQDN of the old server)
(msRTCSIP-TrustedServerFQDN=OldServerFQDN)
NOTEReturn to this step and do another search using the following 2 string formats to find Trusted Server and Trusted Web components:-
msRTCSIP-TrustedMCUFQDN=OldServerFQDN)
msRTCSIP-TrustedWebComponentsServerFQDN=OldServerFQDN)
Be sure to select Subtree so it searches all the trees below this entry. Then click run.
Be sure to make note of these results because they will be required to find them in ADSIEdit.

To delete simply navigate to the full DN, right click and select delete
At this point you could return to the search in ldp and perform additional searches for
Trusted Server and Trusted Web components.


Leave a comment